Debugging USB-Code via JTAG
The Espressif ESP32S3 is a marvellous MCU. One of its best features is the included USB controller that also features internal JTAG/USB debugging without any external equipment. Naturally for this to work the USB controller has to be in JTAG mode. Just recently though I had to debug an issue where my firmware puts the USB controller into USB-NCM (Ethernet over USB) mode, thus JTAG via USB was no option.
For such a case, you need an external JTAG programmer like Espressif's ESP-PROG. Here are the steps you need to do in order to make this work. The end result looks like that:
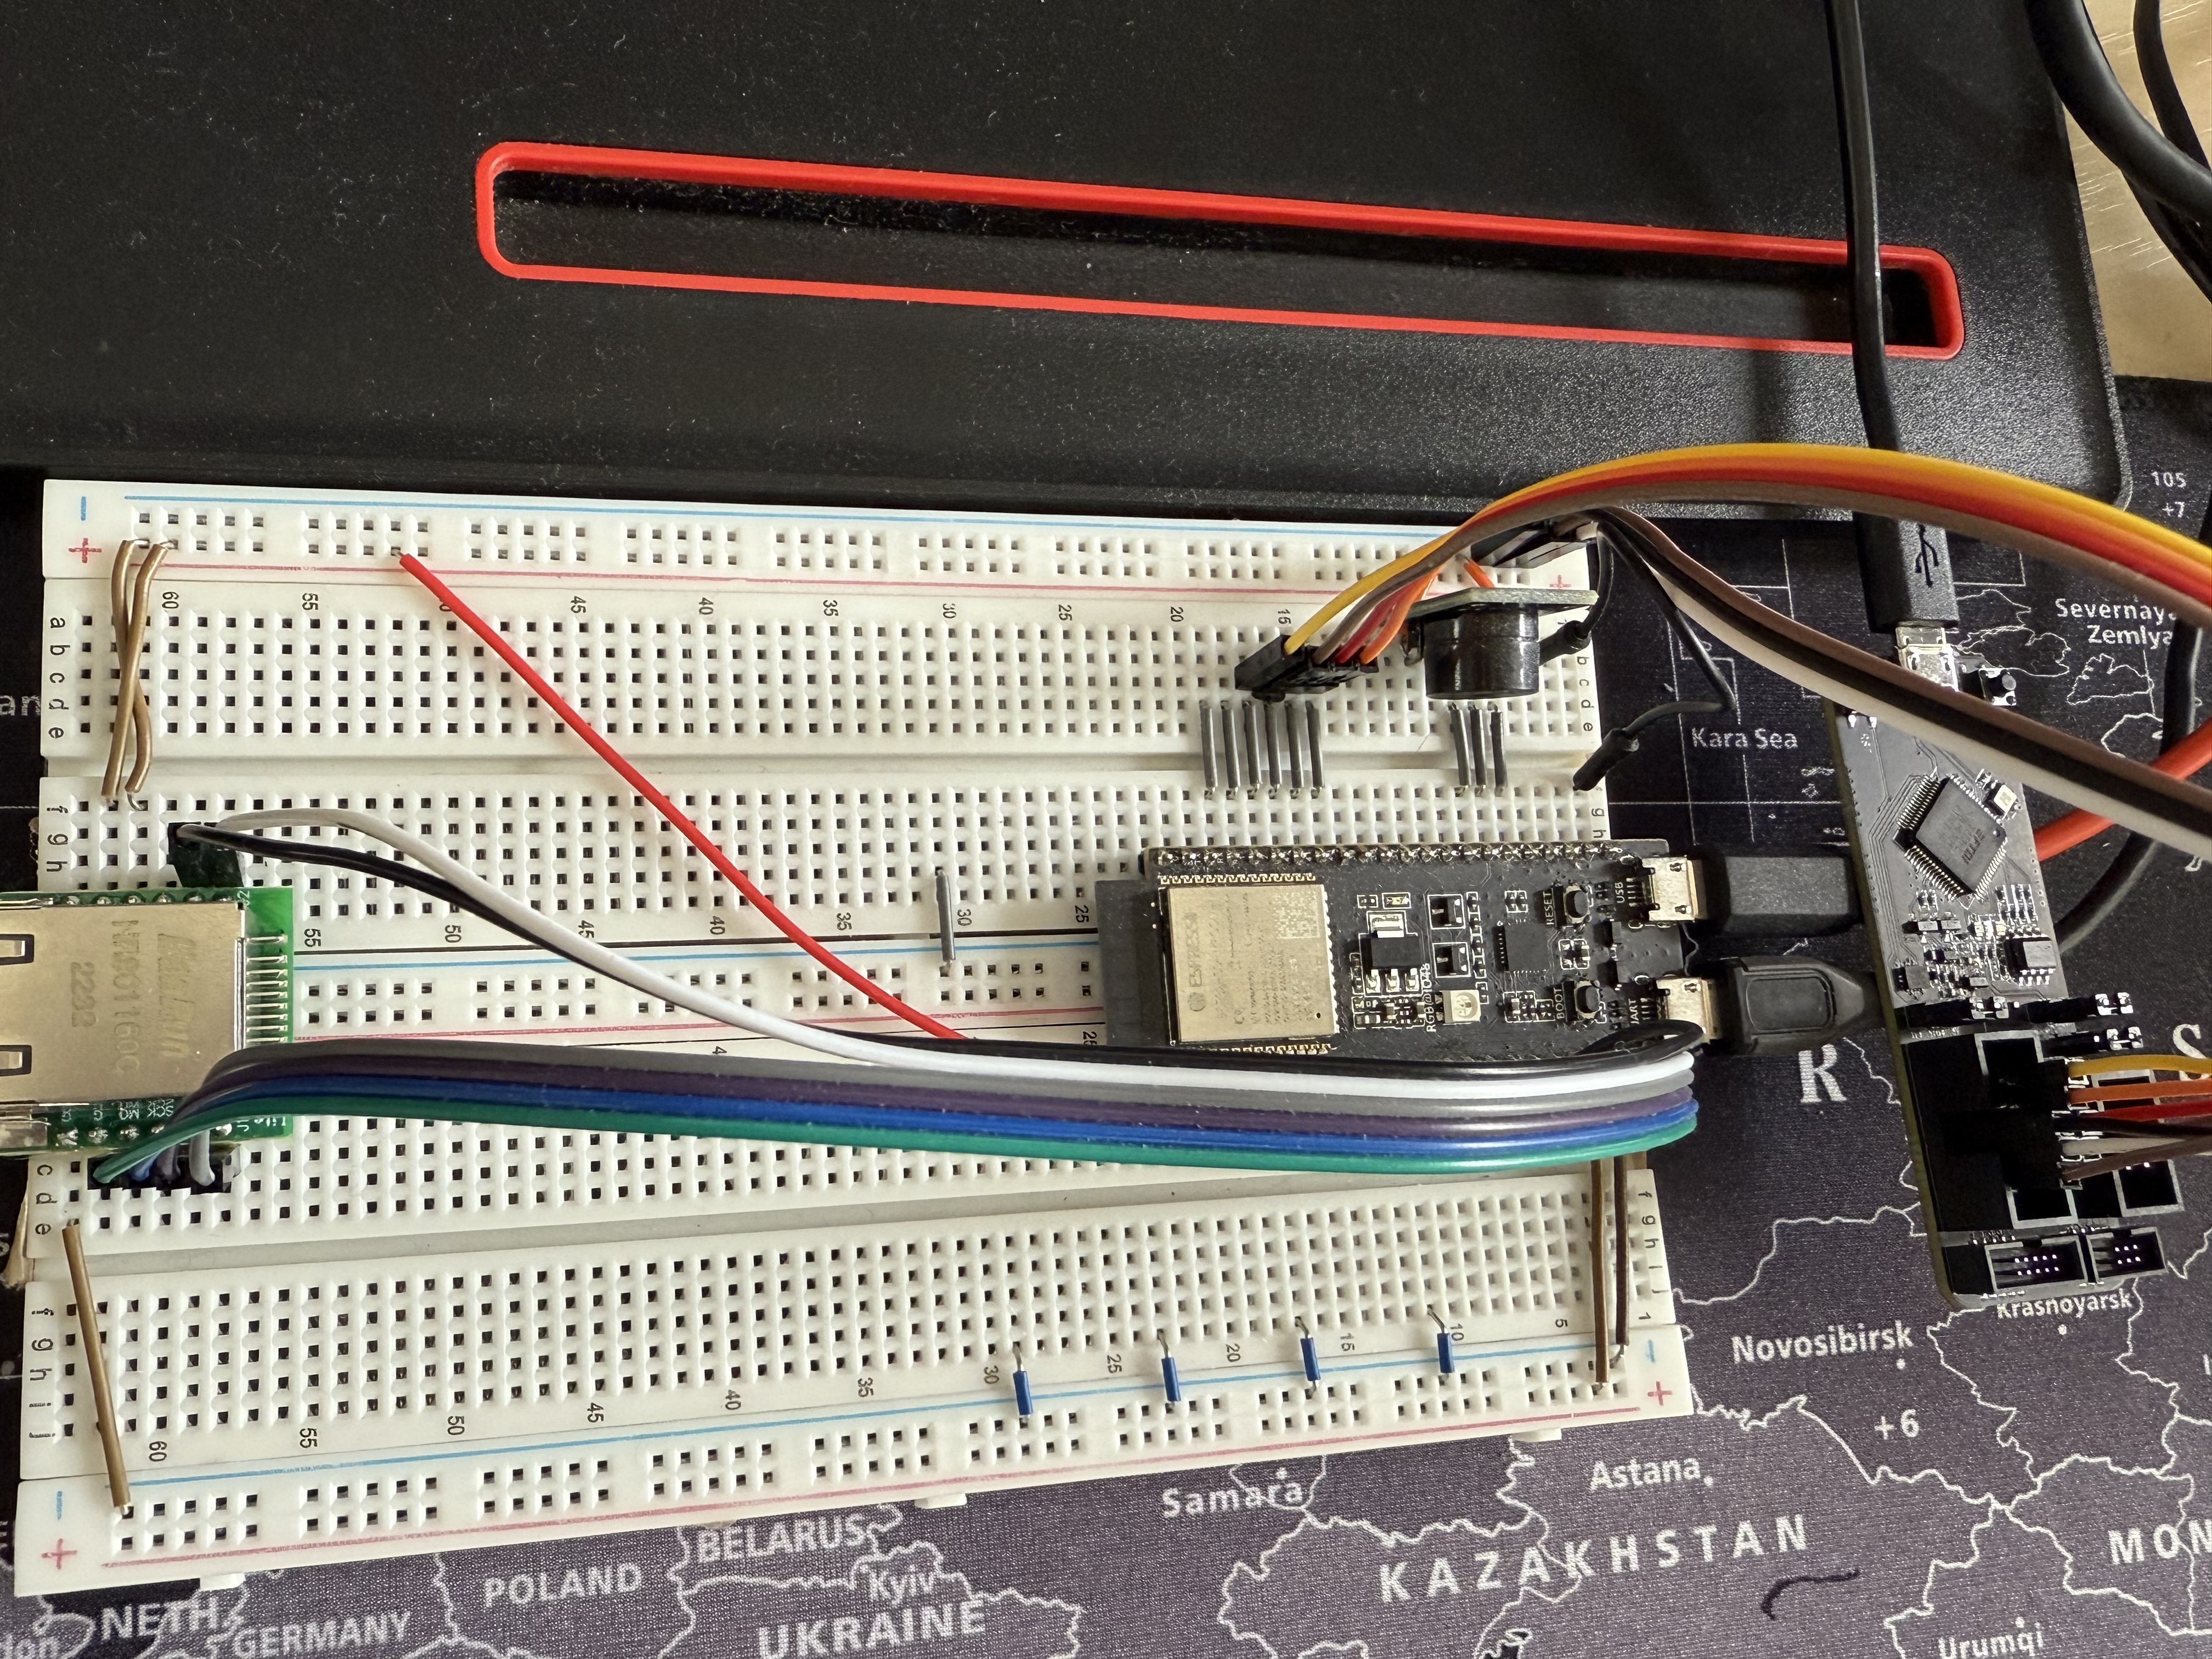
- Connect the ESP-PROG's four JTAG lines to GPIOs 39 - 42.
- Connect GND(!) – People (I'm look at the mirror) tend to forget that.
- Burn the eFuse on your MCU that shortcuts JTAG to the USB controller. Note that this is IRREVERSIBLE. You will never be able to use the internal JTAG again. The eFuse's name is DIS_USB_JTAG:
idf.py efuse-burn -p /dev/ttyUSB0 DIS_USB_JTAG
If you don't want to detach JTAG permanently from the internal USB, there's also the option to burn another efuse instead. Burning STRAP_JTAG_SEL eFuse will enable selection of JTAG interface by a strapping pin, GPIO3.
Finally, relaunch openocd with the correct board support configuration:
openocd -f board/esp32s3-ftdi.cfg
If you're using vscode with Espressif's ESP-IDF extension, you need to edit the settings.json (field idf.openOcdConfigs) instead.
Although this will take four GPIOs from you, you will then be able to debug TinyUSB or whatever you run on the USB controller.